EDITOR’S NOTE: This guest-post was brought to you by unknowntrojan, shedding light on one of the lesser-known plugins, coolsigmaker.
A common desire in reverse engineering is to match re-used code across multiple binaries. Whether you’re doing malware lineage tracking, identifying a statically compiled library, or any other use case about identifying similar code, there are multiple technologies that attempt to solve parts of this problem. Other tools for related problems include SigKit (Binary Ninja’s static library detection), IDA’s FLIRT/FLAIR and Lumina features, or even more advanced systems like Diaphora or BinDiff.
Related to those, you might already be familiar with the “SigMaker” style of plugins for various platforms[1] [2] [3]. These plugins generate patterns from code that can be used to find said code across different binaries or find the same function reliably between application updates. This is useful for malware classification and static-library identification among other purposes.
binja_coolsigmaker is just that: a fast and reliable “SigMaker” plugin for Binary Ninja.
When I started using Binary Ninja, there were two plugins that did roughly the same thing. One was written in Python, and was very slow. The other was written in C++, but would often crash.
I decided to write this plugin in Rust, as it is my language of choice, and would provide me with an easier time extending functionality.
The name is a derivative of the previous plugins because, of course, it’s cool!
Installation
EDITOR’S NOTE:
Because the Binary Ninja plugin manager doesn't currently support native
plugins (though it's in-progress!), you'll need to manually install the plugin
yourself.

That said, as of the latest dev release today (builds >= 6135), the plugin
manager can now show native plugins and take you to the GitHub page for more
information.

In fact, this plugin is the very first example listed there.
Prerequisites
Rust
To compile this plugin, you will need to install Rust via rustup, if you haven’t already.
This plugin requires the nightly channel. The channel can be selected in rustup’s installation dialog, or be installed at any time once rustup is installed.
LLVM
Compiling the plugin requires an installation of LLVM.
This is required by the Binary Ninja Rust API for the bindings generation process.
Compiling
Clone the repository and checkout the branch corresponding to your Binary Ninja update channel.
master corresponds to stable builds and dev to development builds.
git clone https://github.com/unknowntrojan/binja_coolsigmaker.git

# If compiling for the development channel:
git checkout dev

# If compiling for the stable channel:
git checkout master
Due to a limitation with Cargo, it is required to delete the Cargo.lock file whenever the binaryninja dependency changes or is supposed to change. To be on the safe side, simply delete it every time before compiling.
rm Cargo.lock
cargo build --release
After the build has completed successfully, copy the resulting binary (binja_coolsigmaker.dll on Windows, libbinja_coolsigmaker.dylib on macOS, libbinja_coolsigmaker.so on Linux) into your Binary Ninja plugins folder (a sub-folder of your user folder).
Troubleshooting
If the plugin doesn’t load, check the Binary Ninja log for details.
If it complains about a mismatched API version, either update your Binary Ninja to the newest Stable/Dev and double-check that you are on the correct branch of CoolSigMaker, or add a version tag to the binaryninja dependency in Cargo.toml. (e.g. v4.1.5747-stable, see Tags). Note that you can find the correct version for your current install by looking for the api_REVISION.txt file inside of your Binary Ninja install path.
Using the plugin
If everything went well, you are now ready to start using the plugin.
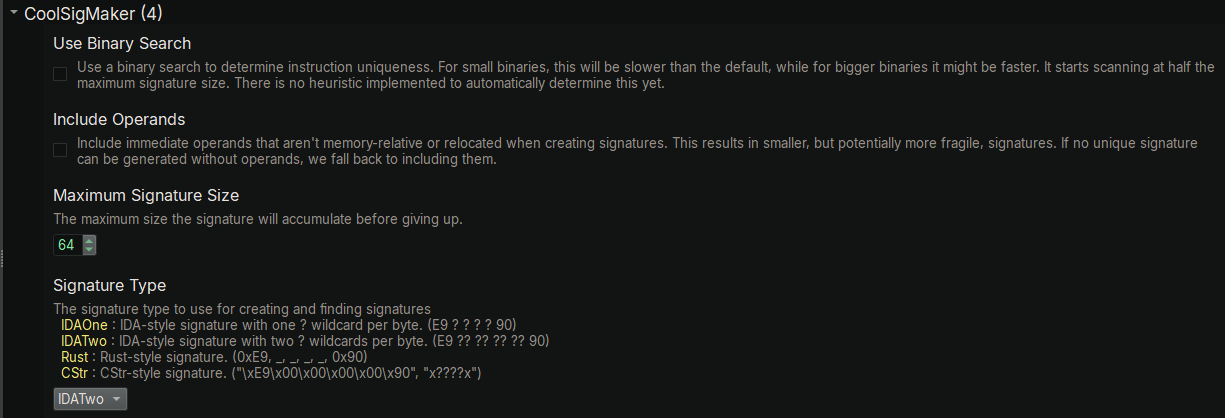
The plugin configuration is available under the CoolSigMaker category in the Binary Ninja Settings Menu.
The default settings will do just fine, although I recommend adjusting the Signature Type according to your preference.
The Rust signature type is for use with coolfindpattern.
Creating Signatures
To create a signature, navigate to the part of code you want to generate a signature for.
Then open the Plugins menu and click CSM - Create Signature from Address.
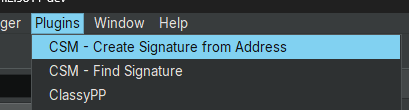
If the signature creation succeeded, the signature will now be in your clipboard and displayed in the log.
Searching for Signatures
To search for a signature, copy the desired signature to your clipboard and click CSM - Find Signature.
The plugin will attempt to parse it according to the Signature Type selected in the Settings.

Log results when creating and searching for a signature
Practical Examples
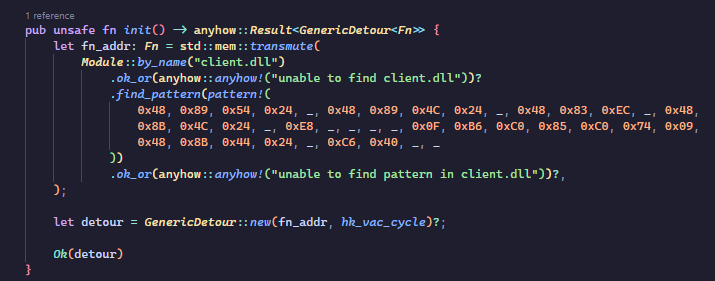
Patching a binary reliably across updates
You might want to patch (or hook into) a binary that gets regular updates. Simply hardcoding an address to patch won’t work here.
This is a good use-case for signatures.
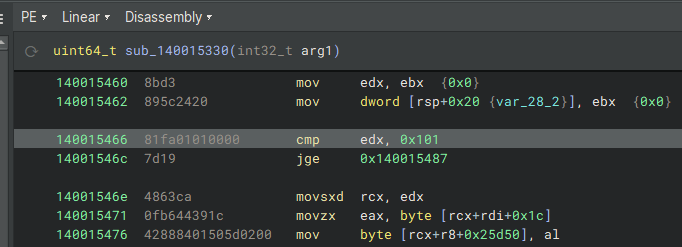
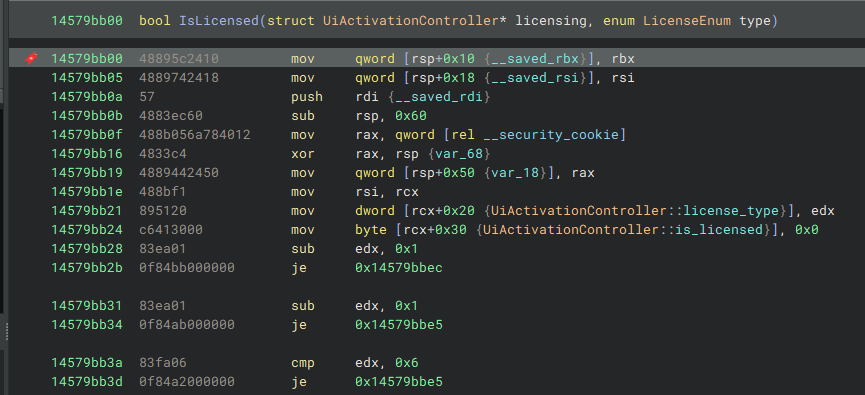
Given this scenario, upon finding the place that you wish to patch/hook, like this function:
Create a signature for it:

And when the application updates, the signature will (hopefully) stay valid until the function itself is updated.
Contributing/Issues
If you wish to improve CoolSigMaker, or are having issues, feel free to head to the repository and open an issue.